In an age where mass-produced items are readily available, personalized gifts stand out as meaningful and heartfelt presents that show thoughtfulness and care. Crafting your own gifts not only adds a unique touch but also allows you to tailor each present to the recipient’s tastes and preferences. Whether you’re celebrating a birthday, anniversary, or just looking to show appreciation, DIY crafts can provide the perfect solution for personalized gifting.
This article explores a variety of easy DIY craft projects that are ideal for creating personalized gifts. Each project is designed to be simple yet impactful, ensuring that even beginners can create beautiful, customized presents.
1. Custom Photo Frames

Materials Needed:
- Plain photo frames (wooden or acrylic)
- Acrylic paint or markers
- Paintbrushes
- Decorative items (stickers, gems, ribbons)
- Glue
Instructions:
- Prep the Frame: Choose a plain photo frame that matches the recipient’s style. Clean it thoroughly before starting.
- Paint or Decorate: Use acrylic paint to add a personal touch to the frame. You can paint designs, patterns, or even write messages. Let the paint dry completely.
- Add Decorations: Once the paint is dry, use decorative items like stickers, gems, or ribbons to enhance the frame. Attach them with glue for a secure hold.
- Insert a Photo: Place a memorable photo of you and the recipient in the frame. This adds a personal touch that will make the gift even more special.
Why It’s Special: A custom photo frame not only showcases a cherished memory but also reflects your creativity and effort. It’s a gift that can be treasured and displayed prominently.
2. Personalized Mugs
Materials Needed:
- Plain ceramic mugs
- Oil-based paint markers or ceramic paint
- Oven (for curing, if necessary)
Instructions:
- Design Your Mug: Use oil-based paint markers or ceramic paint to create a design on the mug. You can write a special message, draw patterns, or create artwork that reflects the recipient’s personality.
- Cure the Paint: If you’re using ceramic paint, follow the manufacturer’s instructions to cure the paint. This often involves baking the mug in an oven to set the design.
- Let Cool: Once the curing process is complete, let the mug cool down completely before wrapping it.
Why It’s Special: Personalized mugs are practical gifts that can be used daily. Each sip will remind the recipient of your thoughtful gesture, and the custom design ensures that it’s a one-of-a-kind gift.
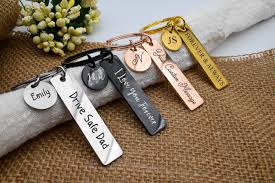
3. Hand-Stamped Jewelry
Materials Needed:
- Blank metal jewelry pieces (pendants, bracelets, rings)
- Metal stamping kit
- Hammer
- Ink pad (optional, for highlighting impressions)
Instructions:
- Design the Jewelry: Plan a design or message that you want to stamp onto the jewelry piece. It could be initials, a special date, or a meaningful word.
- Stamp the Design: Use the metal stamping kit to imprint the design onto the jewelry. Place the metal piece on a hard surface, position the stamp, and tap gently with the hammer.
- Highlight Impressions: For better visibility, you can use an ink pad to highlight the stamped impressions. Wipe off any excess ink to leave only the design.
Why It’s Special: Hand-stamped jewelry is a deeply personal gift that can be worn close to the heart. It’s a lasting reminder of your affection and thoughtfulness.
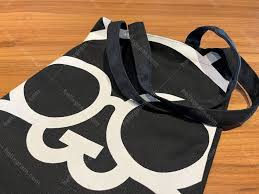
4. Customized Canvas Tote Bags

Materials Needed:
- Plain canvas tote bags
- Fabric paint or fabric markers
- Paintbrushes or sponge brushes
- Stencils (optional)
Instructions:
- Prepare the Bag: Lay the tote bag flat on a protected surface. If you’re using stencils, position them on the bag.
- Paint or Draw: Use fabric paint or markers to create your design on the bag. This could include initials, a favorite quote, or a unique pattern.
- Let Dry: Allow the paint to dry completely before using the bag.
Why It’s Special: A customized tote bag is not only practical for daily use but also reflects personal style. It’s a versatile gift that’s both fashionable and functional.
5. Handmade Scented Candles
Materials Needed:
- Wax (soy wax or beeswax)
- Candle wicks
- Fragrance oils
- Candle molds or jars
- Dye (optional)
Instructions:
- Melt the Wax: Follow the instructions on the wax package to melt it in a double boiler. Add dye if you want colored candles.
- Add Fragrance: Once the wax is melted, mix in fragrance oils to create a personalized scent.
- Prepare the Molds: Place the wick in the center of your candle mold or jar. Pour the melted wax into the mold, making sure the wick stays centered.
- Let Set: Allow the candles to cool and harden completely before removing them from the molds.
Why It’s Special: Handmade scented candles offer a personal touch and can be customized with the recipient’s favorite scents and colors. They add a cozy and relaxing ambiance to any space.
6. Customized Notebooks
Materials Needed:
- Plain notebooks or journals
- Decorative paper or fabric
- Glue or Mod Podge
- Scissors
- Embellishments (stickers, stamps)
Instructions:
- Cover the Notebook: Measure and cut decorative paper or fabric to fit the cover of the notebook. Attach it using glue or Mod Podge, smoothing out any bubbles.
- Add Embellishments: Decorate the cover with stickers, stamps, or hand-drawn designs. Personalize it with the recipient’s name or a meaningful quote.
- Let Dry: Allow the glue or Mod Podge to dry completely before gifting.
Why It’s Special: A customized notebook is a thoughtful gift for anyone who enjoys journaling, planning, or sketching. It’s both practical and personal, reflecting the recipient’s individual style.
7. DIY Bath Salts
Materials Needed:
- Epsom salts or sea salts
- Essential oils
- Food coloring (optional)
- Dried herbs or flower petals (optional)
- Jars or containers
Instructions:
- Mix Ingredients: In a bowl, combine Epsom salts with a few drops of essential oils for fragrance. Add food coloring if desired, and mix well.
- Add Extras: Stir in dried herbs or flower petals for added texture and visual appeal.
- Package the Salts: Transfer the mixture into jars or containers. Label them with a personalized message or scent description.
Why It’s Special: DIY bath salts make for a relaxing and luxurious gift that can be customized with favorite scents and colors. They offer a personal touch that enhances the recipient’s self-care routine.
8. Personalized Keychains

Materials Needed:
- Blank keychains (wooden, acrylic, or metal)
- Paint, markers, or engraving tools
- Key rings
Instructions:
- Design the Keychain: Create a design or message that you want to include on the keychain. This could be initials, a favorite symbol, or a meaningful phrase.
- Apply Design: Use paint, markers, or engraving tools to apply your design to the keychain.
- Attach Key Ring: Once the design is complete and dry, attach the key ring to the keychain.
Why It’s Special: Personalized keychains are practical and versatile gifts that can be carried daily. They offer a small but meaningful way to keep a special memory or message close.
Conclusion
Creating personalized gifts through DIY craft projects allows you to infuse each present with thoughtfulness and creativity. These easy and enjoyable projects not only provide a unique touch but also offer a rewarding experience as you make something special for your loved ones. From custom photo frames and hand-stamped jewelry to personalized mugs and scented candles, each craft is designed to be simple yet impactful, ensuring that your gifts will be cherished and appreciated. So gather your materials, unleash your creativity, and start crafting memorable presents that will bring joy to those who receive them.


