Decorating your home for different seasons can be a fun and fulfilling way to embrace the changing times of the year. Whether you’re preparing for spring, summer, autumn, or winter, seasonal decorations can instantly elevate the ambiance of your living space. DIY craft projects are a fantastic way to add a personal touch to your home decor while saving money. In this article, we’ll explore easy and creative DIY craft projects that you can undertake to bring seasonal flair to your home throughout the year.
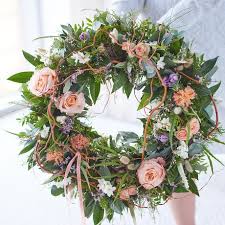
1. Spring Bloom Wreath

Materials Needed
- Grapevine wreath base
- Artificial flowers (e.g., tulips, daffodils, peonies)
- Greenery (e.g., eucalyptus, ivy)
- Hot glue gun and glue sticks
- Floral wire
- Ribbon (optional)
Instructions
- Prepare the Wreath Base: Start by securing the greenery onto the grapevine wreath base using floral wire or hot glue. Arrange the greenery around the wreath to create a base for the flowers.
- Add Flowers: Attach the artificial flowers to the wreath, focusing on evenly distributing them to create a balanced look. Use hot glue to secure the flowers in place.
- Add Finishing Touches: If desired, add a ribbon to the top of the wreath for an extra touch of charm. Hang your spring bloom wreath on your front door or a prominent wall to welcome the new season.
Why It’s Popular
Spring wreaths are a popular DIY project because they are customizable and can instantly refresh your home’s decor. The combination of artificial flowers and greenery creates a vibrant and inviting look that signifies the arrival of spring.
2. Summer Mason Jar Lanterns
Materials Needed
- Mason jars
- Battery-operated tea light candles
- Paint (acrylic or glass paint)
- Paintbrushes
- Twine or ribbon
- Decorative elements (e.g., seashells, sand, or beads)
Instructions
- Prepare the Jars: Clean and dry the mason jars thoroughly. Paint the outside of the jars with your chosen colors, allowing each coat to dry before applying the next. You can create patterns or designs that reflect summer themes.
- Add Decorative Elements: Once the paint is dry, place a small amount of decorative elements like sand or beads at the bottom of each jar.
- Insert Tea Light Candles: Place the battery-operated tea light candles inside the jars. Secure the lids with twine or ribbon to add a rustic touch.
Why It’s Popular
Mason jar lanterns are a versatile and charming addition to summer decor. They can be used both indoors and outdoors, making them ideal for summer parties, barbecues, or a cozy evening on the patio.
3. Autumn Leaf Garland
Materials Needed
- Faux or real autumn leaves
- Twine or string
- Hot glue gun and glue sticks
- Scissors
- Optional: small pinecones or acorns
Instructions
- Prepare the Leaves: If using real leaves, press and dry them between sheets of wax paper. For faux leaves, simply choose a variety of colors and shapes.
- Create the Garland: Cut a length of twine or string to your desired length. Attach the leaves to the twine using hot glue, spacing them evenly along the length of the garland.
- Add Optional Decorations: For added texture, you can glue small pinecones or acorns to the garland.
Why It’s Popular
An autumn leaf garland captures the essence of fall and adds a warm, inviting touch to your home. It’s a simple way to celebrate the changing leaves and can be draped across mantels, doorways, or windows.
4. Winter Snowflake Ornaments

Materials Needed
- Paper or felt sheets (white or silver)
- Scissors
- Glue
- Glitter (optional)
- String or ribbon for hanging
Instructions
- Cut Out Snowflakes: Use scissors to cut out snowflake shapes from paper or felt. You can create various sizes and designs to add visual interest.
- Add Glitter: If desired, apply a thin layer of glue to the snowflakes and sprinkle glitter over them for a sparkly effect.
- Attach Hanging String: Glue a small piece of string or ribbon to the top of each snowflake for hanging.
Why It’s Popular
Winter snowflake ornaments are a classic DIY project that captures the beauty of the season. They are easy to make and can be used to decorate Christmas trees, windows, or even as gift tags.
5. Spring Flower Pot Centerpieces
Materials Needed
- Small terracotta pots
- Acrylic paint
- Paintbrushes
- Artificial flowers
- Floral foam
- Hot glue gun and glue sticks
Instructions
- Paint the Pots: Start by painting the terracotta pots with your chosen colors or patterns. Allow the paint to dry completely.
- Prepare the Floral Foam: Cut the floral foam to fit inside the pots. Secure the foam with hot glue if needed.
- Arrange the Flowers: Insert the artificial flowers into the foam, arranging them to create a full and vibrant centerpiece.
Why It’s Popular
Spring flower pot centerpieces add a touch of nature and color to your home. They are perfect for table settings, shelves, or as a cheerful addition to any room.
6. Summer Beach-Themed Jars
Materials Needed
- Empty glass jars
- Seashells
- Sand
- Miniature starfish or other beach-themed items
- Hot glue gun and glue sticks
Instructions
- Prepare the Jars: Clean and dry the glass jars. Place a layer of sand at the bottom of each jar.
- Add Beach-Themed Items: Arrange the seashells and miniature starfish in the jar on top of the sand. Secure with hot glue if necessary.
- Display: Use these beach-themed jars as centerpieces or decorative accents in your home.
Why It’s Popular
Summer beach-themed jars bring a coastal feel to your decor. They are simple to make and can evoke memories of beach vacations and sunny days.
7. Autumn Pumpkin Decorations
Materials Needed
- Miniature pumpkins (real or craft)
- Paint (orange, green, and other fall colors)
- Paintbrushes
- Glitter or other embellishments (optional)
Instructions
- Paint the Pumpkins: Paint the miniature pumpkins in various colors and designs. Allow them to dry completely.
- Add Embellishments: If desired, add glitter or other embellishments to the pumpkins for a festive touch.
- Display: Arrange the painted pumpkins as part of your autumn decor on tables, mantels, or shelves.
Why It’s Popular
Autumn pumpkin decorations are a staple for fall decor. They are easy to customize and add a festive and seasonal touch to your home.
8. Winter Holiday Advent Calendar

Materials Needed
- Small envelopes or boxes
- Craft paper or card stock
- Markers, stickers, and other decorative items
- Small treats or notes
Instructions
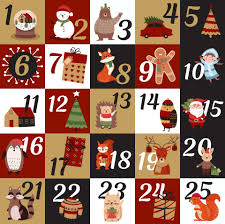
- Create the Calendar: Decorate the envelopes or boxes with holiday-themed designs. Number them from 1 to 24 or 25, depending on how long you want the countdown to be.
- Fill with Treats: Place small treats or notes inside each envelope or box.
- Hang or Display: Arrange the envelopes or boxes on a string or display them in a festive manner.
Why It’s Popular
A winter holiday advent calendar adds an element of excitement and fun leading up to the holiday season. It’s a great way to count down the days and enjoy small surprises.
Conclusion
DIY craft projects for seasonal decorations offer a wonderful way to celebrate the changing seasons while adding a personal touch to your home. From vibrant spring wreaths to cozy winter snowflake ornaments, these easy-to-make crafts are perfect for enhancing your seasonal decor. Not only do they bring a unique charm to your living space, but they also provide a creative outlet for expressing your style and imagination. Embrace each season with these delightful DIY projects and make your home a reflection of the beauty and joy of the year-round festivities.


