In today’s fast-paced world, finding time for creative pursuits can be challenging. Yet, engaging in DIY craft projects is a fantastic way to unwind and express your creativity, even with a busy schedule. Whether you’re a crafting enthusiast or a beginner looking for a stress-relief activity, there are plenty of quick and easy DIY craft projects that fit seamlessly into your hectic life. In this article, we’ll explore some simple yet fulfilling craft ideas that require minimal time and effort, allowing you to enjoy the therapeutic benefits of crafting without the need for extensive time commitment.
1. Personalized Mason Jar Vases
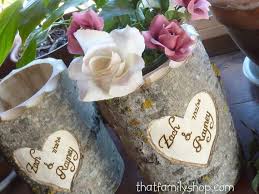
Why Mason Jar Vases?
Mason jar vases are a versatile and charming addition to any home decor. They can be customized easily and make excellent gifts. Plus, they only require a few materials and minimal time to create.
Materials Needed:
- Mason jars
- Paint (acrylic or spray paint)
- Paintbrushes or sponges
- Decorative elements (ribbons, stickers, washi tape)
- Flowers or greenery
Instructions:
- Clean the Mason Jars: Ensure the jars are clean and free of labels.
- Paint the Jars: Apply a coat of paint to the outside of the jars. Use a sponge for a textured effect or a brush for smooth coverage. Let dry completely.
- Decorate: Once the paint is dry, add decorative elements such as ribbons or stickers.
- Add Flowers: Fill the jars with fresh or artificial flowers for a personalized touch.
2. Custom Photo Magnets
Why Photo Magnets?
Photo magnets are practical and sentimental. They make great gifts and are a fun way to showcase your favorite memories. Plus, they can be created quickly and easily.
Materials Needed:
- Photo prints
- Magnetic sheets or adhesive magnets
- Scissors
- Glue stick or adhesive
Instructions:
- Prepare Photos: Print out your favorite photos. Choose ones that fit the size of the magnets.
- Cut and Apply: Cut the photos to match the size of your magnetic sheets. Apply glue or adhesive to the back of the photo and stick it onto the magnetic sheet.
- Trim Edges: Cut out the magnet to fit the shape of the photo.
- Place on Fridge: Your custom photo magnets are ready to be displayed on your refrigerator or any other magnetic surface.
3. Decorative Wooden Coasters
Why Wooden Coasters?
Wooden coasters are both functional and decorative. They can be customized to match any decor style and are simple to make with just a few supplies.
Materials Needed:
- Wooden coasters (pre-cut or plain wooden tiles)
- Paint or wood stain
- Paintbrushes or sponge applicators
- Sealer (optional)
Instructions:
- Prep the Coasters: If needed, sand the wooden coasters to smooth out any rough edges.
- Paint or Stain: Apply paint or wood stain to the coasters. Use different colors or patterns to create a unique look.
- Seal (Optional): Apply a clear sealer to protect the design and make the coasters more durable.
- Allow to Dry: Let the coasters dry completely before using them.
4. DIY Greeting Cards
Why Greeting Cards?
Greeting cards are a thoughtful way to show you care. Creating your own cards allows you to add a personal touch and makes each card unique.
Materials Needed:
- Blank card stock or pre-folded cards
- Colored paper
- Stickers or stamps
- Glue or double-sided tape
- Scissors
Instructions:
- Design the Cards: Cut colored paper into shapes and patterns that you want to use as decorations.
- Assemble: Glue or tape the decorations onto the blank card stock. Add stickers or stamps for extra flair.
- Write a Message: Write a heartfelt message inside the card.
- Finish Up: Allow any glue or ink to dry before sending the card.
5. Easy Fabric Bookmark
Why Fabric Bookmarks?
Fabric bookmarks are practical and easy to make. They add a personal touch to your reading experience and are a great way to use up fabric scraps.
Materials Needed:
- Fabric scraps
- Scissors
- Fabric glue or a sewing machine
- Ribbons or trim (optional)
Instructions:
- Cut Fabric: Cut the fabric into a bookmark shape. A standard size is 2 inches by 6 inches, but you can adjust to your preference.
- Decorate: Add trim or ribbons to the edges of the fabric if desired.
- Glue or Sew: Use fabric glue to attach any embellishments or to hem the edges. If sewing, use a straight stitch to secure the edges.
- Let Dry: Allow the glue to dry completely before using.
6. Simple Candle Holders
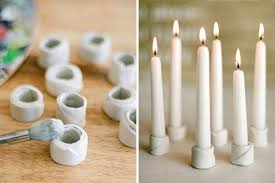
Why Candle Holders?
Candle holders are a great way to add ambiance to any room. They can be customized to fit any decor style and are quick to make.
Materials Needed:
- Empty toilet paper rolls or glass jars
- Paint or decorative paper
- Glue or Mod Podge
- Candles
Instructions:
- Prepare the Holder: For toilet paper rolls, you can paint or cover them with decorative paper. For glass jars, you can use paint or Mod Podge to add patterns.
- Decorate: Apply paint or paper to the exterior of the holder. Let dry.
- Add Candles: Place a candle inside the holder or use the holder as a base for a larger candle.
- Display: Your candle holder is ready to brighten up any space.
7. Personalized Tote Bags
Why Tote Bags?
Personalized tote bags are both practical and stylish. They are great for grocery shopping, carrying books, or as a gift.
Materials Needed:
- Plain tote bags (canvas or fabric)
- Fabric paint or markers
- Stencils (optional)
Instructions:
- Design the Tote Bag: Use fabric paint or markers to create a design on the tote bag. You can use stencils for precision or freehand for a more personal touch.
- Let Dry: Allow the paint or marker to dry completely before using the bag.
- Use or Gift: Your custom tote bag is ready for everyday use or to be given as a thoughtful gift.
8. Quick Knotted Bracelets
Why Knotted Bracelets?
Knotted bracelets are simple to make and require minimal supplies. They are a fun and personal accessory or a great gift for friends.
Materials Needed:
- Embroidery thread or cord
- Scissors
- Clasps (optional)
Instructions:
- Cut the Thread: Cut several strands of embroidery thread to your desired bracelet length.
- Tie Knots: Use simple knotting techniques to create patterns or designs. You can find various tutorials for different knotting styles.
- Finish: Tie the ends securely or attach clasps if desired.
- Wear or Gift: Your knotted bracelet is ready to wear or give to someone special.
9. DIY Plant Pots
Why Plant Pots?
Creating your own plant pots is an enjoyable and environmentally friendly way to add greenery to your space. You can personalize them to suit your home decor.
Materials Needed:
- Terracotta pots or recycled containers
- Paint or decorative paper
- Paintbrushes or sponges
- Soil and plants
Instructions:
- Decorate the Pots: Paint or cover the pots with decorative paper. Let dry completely.
- Add Plants: Fill the pots with soil and your choice of plants.
- Display: Place your custom plant pots in your home or garden.
10. Easy Paper Crafts
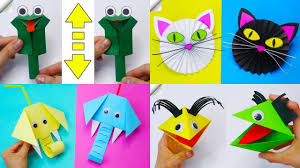
Why Paper Crafts?
Paper crafts are versatile, affordable, and easy to create. They can be used for decoration or practical purposes and are perfect for quick crafting sessions.
Materials Needed:
- Colored paper or cardstock
- Scissors
- Glue or tape
- Decorative elements (optional)
Instructions:
- Choose a Project: Decide on a simple paper craft, such as making paper flowers, origami, or paper garlands.
- Cut and Assemble: Cut the paper into the necessary shapes and assemble according to your chosen project.
- Add Details: Use glue or tape to secure the pieces and add any decorative elements if desired.
- Display or Use: Your paper craft is ready to be displayed or used.
Conclusion
Crafting doesn’t have to be time-consuming to be enjoyable and rewarding. With these quick and easy DIY craft projects, you can fit creativity into your busy schedule and produce beautiful, personalized items. Whether you’re looking to make gifts, decorate your home, or simply find a relaxing hobby, these projects offer a perfect balance of simplicity and satisfaction. Embrace your creativity with these crafts, and enjoy the therapeutic benefits of making something with your own hands.
