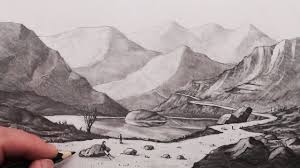
Painting landscapes can be a rewarding and enjoyable experience for beginners. It allows you to capture the beauty of nature and express your creativity. This comprehensive guide will walk you through essential techniques, materials, and tips for painting landscapes, ensuring you have a solid foundation to create beautiful and realistic artworks.
1. Choosing Your Materials

Before you start painting, it’s crucial to select the right materials. Here’s a list of essentials:
- Canvas or Paper: Choose a canvas or watercolor paper suitable for your chosen medium. Acrylic and oil painters typically use stretched canvases, while watercolorists use high-quality watercolor paper.
- Paints: For beginners, acrylic paints are often recommended due to their versatility and quick drying time. Oil paints offer a more extended drying period, allowing for more blending, while watercolors provide a transparent and fluid look.
- Brushes: Invest in a variety of brushes, including flat, round, and filbert brushes. Each brush type offers different effects, from broad strokes to detailed lines.
- Palette: Use a palette to mix your paints. A simple acrylic or glass palette works well for acrylics, while a ceramic palette is great for oil paints.
- Easels: An easel can help you work comfortably at an angle. Desktop easels are perfect for small spaces, while standing easels are ideal for larger canvases.
2. Understanding Composition
Composition is key to creating a visually appealing landscape painting. Here are some fundamental principles:
- Rule of Thirds: Divide your canvas into nine equal parts by two equally spaced horizontal lines and two equally spaced vertical lines. Place essential elements of your landscape along these lines or their intersections to create balance and interest.
- Focal Point: Determine the main focal point of your painting. This could be a mountain, tree, or river. Ensure that your focal point draws the viewer’s attention and stands out from the rest of the composition.
- Foreground, Middleground, and Background: Organize your painting into these three planes to create depth. The foreground includes elements closest to the viewer, the middleground contains objects at a mid-distance, and the background features distant elements.
3. Sketching Your Landscape

Before applying paint, sketch the basic outline of your landscape. This step helps establish the composition and proportions of your painting:
- Light Sketching: Use a pencil or light charcoal to sketch the main elements of your landscape. Focus on the overall shape and placement of objects, such as mountains, trees, and bodies of water.
- Refining Details: Once you’re satisfied with the general outline, add more details to your sketch. Define key features and adjust proportions as needed.
4. Applying Base Colors
Base Colors provide the foundation for your painting and help establish the overall mood and atmosphere:
- Blocking In: Start by applying broad strokes of color to cover large areas of your canvas. Use a large brush to block in the basic colors of your landscape, such as the sky, land, and water.
- Color Mixing: Mix your colors on the palette to achieve the desired hues. Experiment with different color combinations to create realistic and harmonious tones.
- Layering: Build up layers of color gradually. Allow each layer to dry before applying the next to avoid muddying your colors.
5. Adding Details and Texture
Once the base colors are dry, add details and texture to bring your landscape to life:
- Detailing: Use smaller brushes to add intricate details, such as leaves on trees, texture on rocks, and reflections in water. Pay attention to light and shadow to enhance the realism of your painting.
- Texture Techniques: Experiment with different techniques to create texture. For example, use a dry brush technique to create the appearance of rough surfaces or a palette knife to add texture to mountains and rocks.
- Blending: Blend colors smoothly to achieve realistic transitions and gradients. Use a clean brush or blending tool to soften edges and create a seamless effect.
6. Final Touches and Refinements

Final Touches complete your painting and ensure that all elements are cohesive:
- Highlights and Shadows: Add final highlights and shadows to enhance depth and dimension. Focus on areas where light hits and where shadows fall to create contrast and visual interest.
- Adjustments: Step back and evaluate your painting from a distance. Make any necessary adjustments to balance colors, refine details, and improve overall composition.
- Sign Your Work: Once you’re satisfied with your painting, sign your work in a discreet area. This adds a personal touch and signifies that the painting is complete.
7. Tips for Beginners
Here are some additional tips to help you as you embark on your landscape painting journey:
- Practice Regularly: The more you paint, the better you’ll become. Practice different landscapes and techniques to develop your skills and style.
- Use References: Study photographs or work from real-life scenes to understand how light, color, and perspective affect your landscape.
- Stay Patient: Painting takes time and patience. Don’t rush the process and allow yourself to make mistakes and learn from them.
- Seek Feedback: Share your work with others and seek constructive feedback. Joining a painting group or taking a class can provide valuable insights and encouragement.
Conclusion
Painting landscapes as a beginner can be a fulfilling and enjoyable experience. By understanding basic materials, composition, sketching techniques, and color application, you can create beautiful and realistic landscape paintings. Remember to practice regularly, experiment with different techniques, and most importantly, have fun with your creative process. Happy painting!
Feel free to ask if you need any more information or adjustments to this guide!


